top of page

Machine sewing resources for YOU

Feel free to check out our curated list of instructional videos to help you get started on your sewing machine. When you are ready, scroll to the bottom of the page and click the blue arrow to Bag It Up

How to Thread a Machine | Sewing Machine
03:39

How to Thread a Machine | Sewing Machine

Full PLaylist: https://www.youtube.com/playlist?list=PLLALQuK1NDriabACbDfMMfR6KucpOUFC6 - - Top Rated Products for Every Sewing Project: Singer Beginners Sewing Kit: http://amzn.to/1VwUwIN Gingher Dressmaker's Shears: http://amzn.to/1VwW2L3 One-Yard Wonders: 101 Sewing Projects: http://amzn.to/1Q98Dkz Dritz Deluxe Seam Ripper: http://amzn.to/1N3d2Wd Clover Leather Coin Thimble: http://amzn.to/1Ks5IEV Watch more How to Use a Sewing Machine videos: http://www.howcast.com/videos/512564-How-to-Thread-a-Machine-Sewing-Machine Hi. I'm Jennifer from Workroom Social, and right now I'm going to show you how to thread your sewing machine. So, you should always look at your sewing machine's user's manual for exact instructions on how to thread a machine. But there is kind of an intuitive way that you can think about it, so that you can kind of walk into any machine and know how to thread it. 
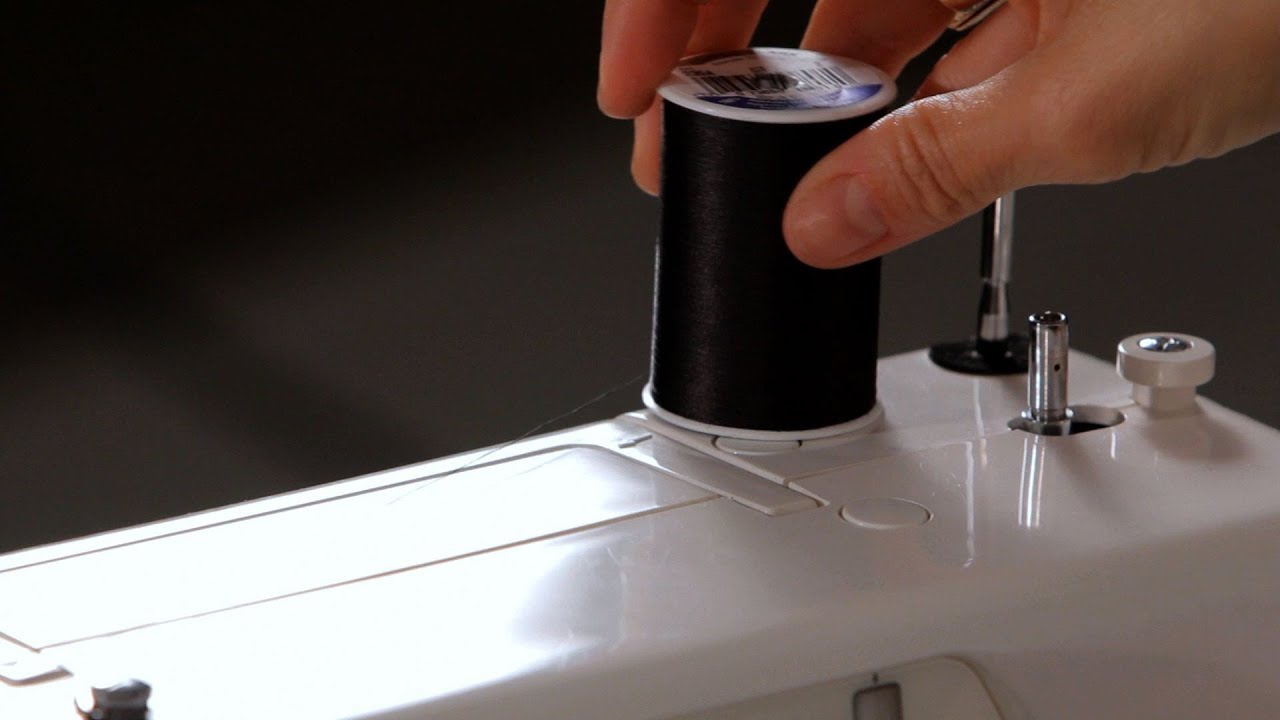
So, the first thing you want to do is take your thread and put it into your spool pin at the back. Now, you want your thread to roll off the spool in a counter-clockwise fashion. The thread should be towards the back. Now, my machine has numbers listed though the processes to show you how to thread the machine. So, I'm just going to follow those. First thing I want to do is put it though this top loop, and then I'm going to pull the thread down, and that's going to pull the thread through the tension disks. So, you always want to make sure that your thread is through the tension disks, which will change the tension on your sewing. So, it's helpful if you kind of just hold this still, because as I'm pulling with my left hand and threading the machine, this is going to move, which is kind of annoying. You're going to end up with a huge tail. So, just hold this. 
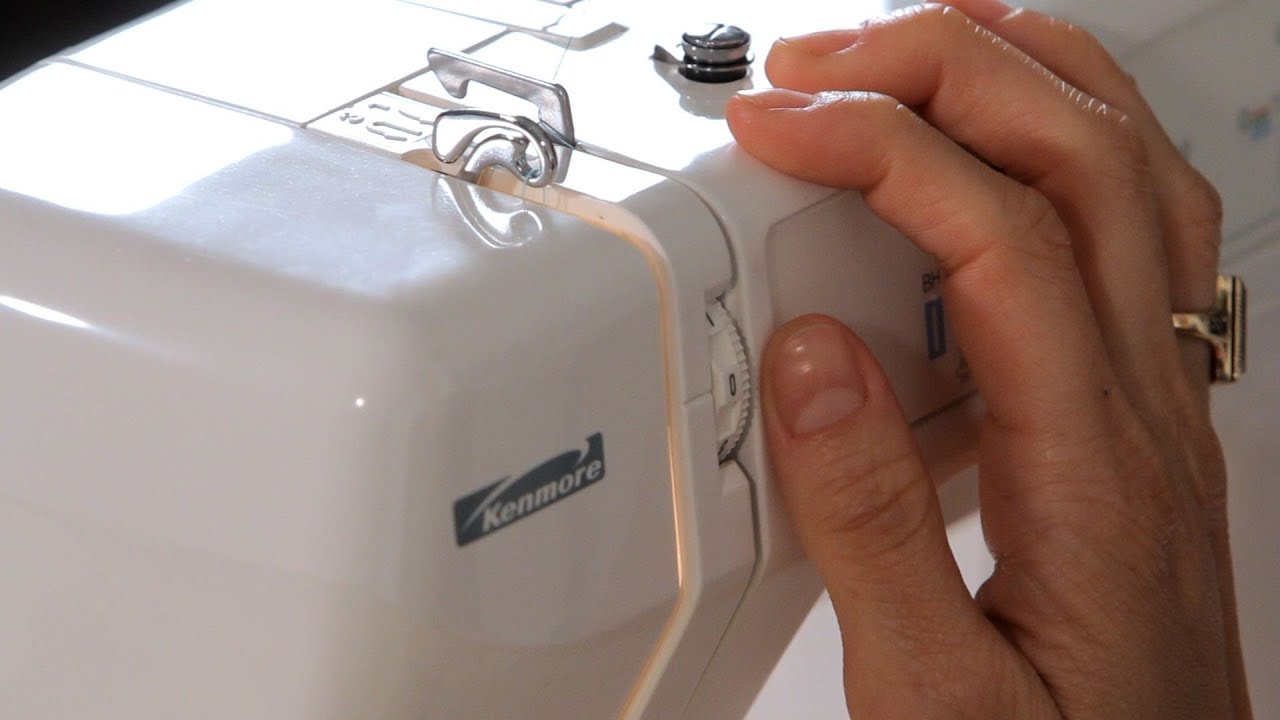
Now, I'm going to go down, around, and back up. And now I need to put my thread through this piece that pulls the thread up and down. So, you noticed it wasn't there. All you have to do in that case, is to use your hand wheel on the side, and you want to twist it towards you, and that's going to send your needle up and down, and it's going to pull the lever up. So, I want the lever in its highest position, and then I'm going to pull the thread through. So, the thread is secure there. 
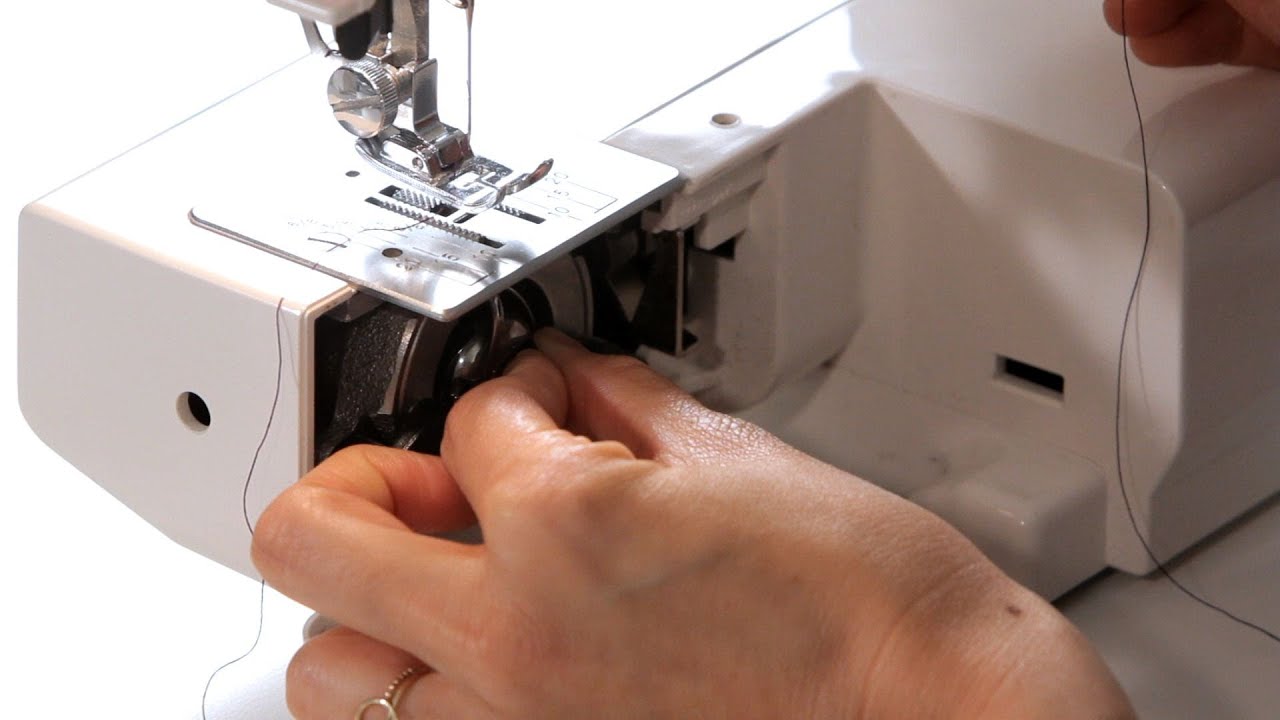
Then, I'm going to pull it down. And on the left of my needle, there's a little hook. So, I'm going to put my thread through the hook on the left. Sometimes they're a little more forward, sometimes they're on the left, sometimes they don't have it. It's not a huge deal. But, basically, you want to think about your thread going in a fluid motion to get to the needle. Now, I've kind of got that long tail so I'm just going to clip my thread off, and the last step is to take the thread and put it through the eye of the needle. Now, some machines, like mine, have an automatic needle threader. If the needle is in the highest position, I can just pull this down, and a little, tiny hook goes though the eye of the needle. It pulls the thread right through the back. If your machine doesn't have that, you can thread your needle with a magnifying glass, maybe. Just cut your thread off so it's a nice sharp edge, and you can just do by hand, putting the thread through the needle. Now, be sure to check your user manual. Most modern machines thread front to back. I have seen some vintage machines that thread back to front, and then industrial machines thread left to right. So, just double check and make sure, but most machines are front to back. And then take your thread and put it underneath your presser foot, and you are done. You've threaded your sewing machine.
How to Wind a Bobbin | Sewing Machine
02:33

How to Wind a Bobbin | Sewing Machine

Full PLaylist: https://www.youtube.com/playlist?list=PLLALQuK1NDriabACbDfMMfR6KucpOUFC6 - - Top Rated Products for Every Sewing Project: Singer Beginners Sewing Kit: http://amzn.to/1VwUwIN Gingher Dressmaker's Shears: http://amzn.to/1VwW2L3 One-Yard Wonders: 101 Sewing Projects: http://amzn.to/1Q98Dkz Dritz Deluxe Seam Ripper: http://amzn.to/1N3d2Wd Clover Leather Coin Thimble: http://amzn.to/1Ks5IEV Watch more How to Use a Sewing Machine videos: http://www.howcast.com/videos/512562-How-to-Wind-a-Bobbin-Sewing-Machine Hi. I'm Jennifer from Workroom Social, and today we're going to talk about how to wind a bobbin. So, what is a bobbin? These are a couple of bobbins. Every sewing machine has a different bobbin that is specifically made for their machine, so you should refer to your manual to see what kind of bobbin your machine needs. But, basically, a bobbin is the mini spool of thread that sits at the bottom of your machine to make your stitches. So, to wind the bobbin, the first thing you need to do is to take your thread and you're going to put it in the thread holder on your machine. Now, the main thing you want to sort of pay attention to about winding your bobbin is your thread needs tension. So, here's my tension disk on my machine, and that's going to hold the thread taut. So, I'm just going to put it through there, and then I'm going to take the end of my thread and put it through a little, tiny hole that sits on the inside of my bobbin. And I'm going to just pull it out and hold it up. Then I'm going to attach my bobbin to the bobbin spindle and I'm going to lock it into place. That engages this component of your machine. The next thing that's important to do is to disengage your needle. So, on my machine that's here on the right hand side. And I'm just going to pull it out. And what that's going to do, it's going to prevent my needle from going up and down, which we don't need to happen right now. And then I'm going to hold the top of my thread so it doesn't get dangled and I'm going to step on the presser foot. And we're going to get a couple of spins and then I'm just going to cut this top. I don't need this anymore. And then I'm going to wind this bobbin. Now, you'll see, as the thread is going, it should be going up and down in a fairly even motion. And if that's happening, you know you have a good tension. If it's not happening, it could be for a couple of reasons. One, you just might be a little off balance, in which case you can take, this is an awl, you can take that or a pencil or something and stick it underneath to help guide your thread up and down. You want your bobbin to be nice and even. Now, this will stop automatically when it's done. Or, if you only want a little bit you can just stop it ahead of time. And you'll just clip that off, and now you have your threaded bobbin.
How to Load a Bobbin | Sewing Machine
02:53

How to Load a Bobbin | Sewing Machine

Full PLaylist: https://www.youtube.com/playlist?list=PLLALQuK1NDriabACbDfMMfR6KucpOUFC6 - - Top Rated Products for Every Sewing Project: Singer Beginners Sewing Kit: http://amzn.to/1VwUwIN Gingher Dressmaker's Shears: http://amzn.to/1VwW2L3 One-Yard Wonders: 101 Sewing Projects: http://amzn.to/1Q98Dkz Dritz Deluxe Seam Ripper: http://amzn.to/1N3d2Wd Clover Leather Coin Thimble: http://amzn.to/1Ks5IEV Watch more How to Use a Sewing Machine videos: http://www.howcast.com/videos/512565-How-to-Load-a-Bobbin-Sewing-Machine Hi. I'm Jennifer from Workroom Social, and I'm going to show you how to load a bobbin into your sewing machine. So, the first thing you want to do is thread your sewing machine. After your sewing machine is threaded, you want to take your wound bobbin and you kind of want to just extend a little thread to have as a small tail. Now, my machine has an arm here that comes off, so I'm going to take that off and move it aside. My sewing machine is a vertical bobbin. There are also some machines that are horizontal bobbins. So, you should just go back to your user's manual to see instructions for loading your bobbin. On my machine, I have a casing here. This is a bobbin casing, and I'm going to take my bobbin and I want to place it inside my casing with the thread going counter clockwise. And I'm just going to look and see that this notch, which is where the thread is going to go through, is going sort of to the left. So, I want my thread to go in the same direction as the bobbin casing, and then I'm going to take the thread and kind of pull it under there. And now you can see when I pull the thread, the bobbin turns. So, now with the bobbin in the casing, you're going to go ahead and load it into your machine. You'll take this little lever and hold it out. That will keep your bobbin from falling out of the casing, because that is kind of annoying when it's rolling all around on your floor. And then you are just going to place it into your machine. There is this little notch up at the top, that there is a corresponding notch in the machine, so you can't really mess it up. Just put it in until it gets into place and it doesn't turn, and then you can let go of that lever. Now, that's in and that's steady. The last thing you want to do is you want to pull this thread up though your throat plate, so that both threads are underneath your presser foot. So, to do that, you'll just hold your needle thread. And using the hand wheel on the right, you're going to twist it towards you to send the needle down, and back up, and then you'll kind of tug on this thread, and there is a bobbin thread. They're two different colors, so you can see this one is the bobbin thread and the purple is the needle thread. You'll just put those towards the back of your machine, and now you're ready to sew.
What Are Presser Feet? | Sewing Machine
03:35

What Are Presser Feet? | Sewing Machine

Full PLaylist: https://www.youtube.com/playlist?list=PLLALQuK1NDriabACbDfMMfR6KucpOUFC6 - - Top Rated Products for Every Sewing Project: Singer Beginners Sewing Kit: http://amzn.to/1VwUwIN Gingher Dressmaker's Shears: http://amzn.to/1VwW2L3 One-Yard Wonders: 101 Sewing Projects: http://amzn.to/1Q98Dkz Dritz Deluxe Seam Ripper: http://amzn.to/1N3d2Wd Clover Leather Coin Thimble: http://amzn.to/1Ks5IEV Watch more How to Use a Sewing Machine videos: http://www.howcast.com/videos/512566-What-Are-Presser-Feet-Sewing-Machine Hi, I'm Jennifer from Workroom Social. Now let's talk about presser feet. I have several different presser feet on the table here with me, and the first thing you should do when choosing presser feet is to go to your sewing machine's manual and just see what kind of feet your sewing machine uses. I have some examples here. These two different presser feet have different shank heights. This is what we would call a high shank, and this is a low shank. My sewing machine uses a low shank. Then there's also two main kinds of ways that the presser feet can attach to the machine. This presser foot just screws right in. And this presser foot, this top part screws in, but it has a quick release so that you can attach different feet to the shank itself, versus swapping out the whole thing. What do we have on the table here? We have a couple things. This is a blind hem foot and we have a little piece here, when we do a blind hem, the stitches kind of do a quick little bite into the main fabric, so this bar keeps you straight so that you're always just taking a little bit of fabric. We have an edge stitch foot here. There is a little guide on the right-hand side that keeps your fabric perfectly in a straight line, which is very lovely. We have different zipper feet. These are two-directional so you can go to the left or to the right, depending on which side you're sewing the zipper on. We have a one-directional zipper foot here, so on this foot your zipper could only be on the right-hand side, and then you would need to sort of turn your project around to get to the other side. This foot can be used for zig-zag. It has the large hole in between. When your needle's going left and right, you definitely don't want to have a foot like this in. This is a straight stitch foot. You can see this little hole in the middle that, if you're sewing delicate fabrics, sometimes if you use a zig-zag foot with this wide hole, your fabric can kind of come up in between. So if you're doing a straight stitch, it's nice to use this foot that just has a little hole. It keeps your fabric down. You definitely don't want to sew a zig-zag with a straight stitch foot because your needle will hit the presser foot and then that is not good for your machine. We also have a walking foot, which is great for quilting or if you're sewing thick, slippery fabrics like leather or vinyl, a walking foot is great. We have a buttonhole attachment, which we'll show as well. I'm just going to show you quickly how to put a presser foot on the machine. You just want to unscrew your screw right here on your machine. Put it to the side. Then you're going to go ahead and take your foot and put it onto the machine. Take the screw and screw it back in. It's a little tricky. All right. Then, again, you want to make sure that your attachment foot is as high as it'll go. So twist the screw until it's tight, and now you're ready to sew.
How to Adjust Tension | Sewing Machine
03:35

How to Adjust Tension | Sewing Machine

Full PLaylist: https://www.youtube.com/playlist?list=PLLALQuK1NDriabACbDfMMfR6KucpOUFC6 - - Top Rated Products for Every Sewing Project: Singer Beginners Sewing Kit: http://amzn.to/1VwUwIN Gingher Dressmaker's Shears: http://amzn.to/1VwW2L3 One-Yard Wonders: 101 Sewing Projects: http://amzn.to/1Q98Dkz Dritz Deluxe Seam Ripper: http://amzn.to/1N3d2Wd Clover Leather Coin Thimble: http://amzn.to/1Ks5IEV Watch more How to Use a Sewing Machine videos: http://www.howcast.com/videos/512568-How-to-Adjust-Tension-Sewing-Machine Hi, I'm Jennifer from Workroom Social. Now let's talk about thread tension. Thread tension is really important on your sewing machine because you want your stitches to be really nice and even, meaning that the stitches on top and on bottom are the same. This is your tension adjustment right here, and every sewing machine has one. The lower number means that it's loose and the higher number, mine goes all the way up to nine, means that the thread is really tight. So, depending on what you are sewing, what kind of fabric, and how many layers, what kind of thread you're using, your tension is going to change. I just want to illustrate for you what you're looking for in thread tension. I've set my thread tension right now to zero, which means that it's super loose, and we're going to sew some stitches. Now let's take a look and see what that looks like. You can see here, with the loose thread tension, if you flip it over, the bobbin thread is pulling the top thread through because the top thread is not tight enough; it's not holding its own, if you will, so you can see all the little light blue dots coming through. So that's a loose thread tension. Now, if we want to see what a too tight thread tension is, I'm going to turn my tension all the way to nine, the highest it can go. Just stitch a little bit and we'll pull this out. You can see, even when I'm pulling it out it's kind of hard because the thread is really being held tight. We have the opposite problem here. So, in this example, we have the bobbin thread being pulled up through the fabric because the top thread is much too tight. I'm going to take this down to around a four, somewhere in the middle, and sew a couple of stitches. Now let's take a look at that. Now you see here, you have little blue dots on the front, and that's the bobbin thread; you have light blue dots on the back which is the top thread. As long as they are even, you know that your sewing machine is making even stitches. If we look at all of the stitches that we've made and compare them, we look here and we see that we have a lot of little blue bobbin threads coming out on top. We have the opposite problem here where we have the top stitch thread is all on the underside, no bobbin here. Then we go to our balanced example where we can see a little bit of each thread, the top and the bobbin thread on both sides. That's a well-balanced stitch. Now, I'm using two different colors here to illustrate this example but if you're sewing a garment or something, and you've got your top stitch here and your bobbin thread are going to be the same color, so you're not actually going to see these little dots. But this is a good way to see if your machine has a good thread tension.
How to Sew Straight Stitch or Topstitch | Sewing Machine
02:48

How to Sew Straight Stitch or Topstitch | Sewing Machine

Full PLaylist: https://www.youtube.com/playlist?list=PLLALQuK1NDriabACbDfMMfR6KucpOUFC6 - - Top Rated Products for Every Sewing Project: Singer Beginners Sewing Kit: http://amzn.to/1VwUwIN Gingher Dressmaker's Shears: http://amzn.to/1VwW2L3 One-Yard Wonders: 101 Sewing Projects: http://amzn.to/1Q98Dkz Dritz Deluxe Seam Ripper: http://amzn.to/1N3d2Wd Clover Leather Coin Thimble: http://amzn.to/1Ks5IEV Watch more How to Use a Sewing Machine videos: http://www.howcast.com/videos/512571-How-to-Sew-Straight-Stitch-or-Topstitch-Sewing-Machine Hi. I'm Jennifer from Workroom Social. Now, let's talk about stitching. So, once your machine is already set up and you want to start sewing, this is what you do. We're going to do a straight stitch right now. We're going to start with a basic stitch length. We're going to go 2.5 on the stitch length. We've got a pretty low, low-ish tension, between a 3 and a 4, just for what I'm doing here. And I want to sew this fabric in half so that one side is touching the other. So, I'm just going to make the raw edges touch. I'm going to lift my presser foot and put my fabric underneath. I'm going to line the raw edge with the seam guide on my throat plate at five-eighths of an inch, five-eighths of an inch seeam allowance, which is very common for home sewing projects. I'm going to lower the presser foot. Make sure everything is straight. And then, I'm going to sew a straight line. So, the best thing to do while you're doing this is you want to hold the fabric. Your fabric's to the left and you're using your seam guide to your right. You want to just let the feed dogs, which are the little teeth that sit underneath the presser foot, you want to let them pull the fabric. You don't want to push. You don't want to pull from the backside. It's going to stretch your fabric and it's really uncomfortable to do that, anyway. So, we're just going to go. Once we're all set up, we'll sew a straight line. As you're going along, feel free to stop at any point if something is going a little funny or you're not sure if you're going exactly straight or if you need to reposition the fabric. You don't have to sew your straight line all at once. It's okay to take a break. You'll notice I'm not using pins here, so I want to stop every once in a while and go back and realign my fabric, making sure my raw edges are together. When I got to the end, I just sewed off the fabric, I'm going to pull my piece of fabric out, cut my tails, and then here is our straight stitch, parallel with our raw edge because we used our seam guide. And now you're ready to make all kinds of fun things. And that's how you do a straight stitch.
How to Troubleshoot Bobbin Problems | Sewing Machine
03:12

How to Troubleshoot Bobbin Problems | Sewing Machine

Full PLaylist: https://www.youtube.com/playlist?list=PLLALQuK1NDriabACbDfMMfR6KucpOUFC6 - - Top Rated Products for Every Sewing Project: Singer Beginners Sewing Kit: http://amzn.to/1VwUwIN Gingher Dressmaker's Shears: http://amzn.to/1VwW2L3 One-Yard Wonders: 101 Sewing Projects: http://amzn.to/1Q98Dkz Dritz Deluxe Seam Ripper: http://amzn.to/1N3d2Wd Clover Leather Coin Thimble: http://amzn.to/1Ks5IEV Watch more How to Use a Sewing Machine videos: http://www.howcast.com/videos/512589-How-to-Troubleshoot-Bobbin-Problems-Sewing-Machine Hi, I'm Jennifer from Workroom Social, and today I'm going to help you troubleshoot your bobbin problems. So let's go ahead and look into our bobbin area. I'm just going to remove this case and get into our bobbin area. I open this up and I see here is my bobbin casing. Sometimes when you're sewing you might have problems, and the stitches aren't coming out right, or things are getting stuck, and you don't know what's going on. I always recommend taking out the bobbin and the bobbin casing. The first thing you should always do is just re-thread it and start over. You'll take everything out, make sure your thread is not knotted or crazy on your bobbin. You can even pull some of it and cut it so that everything is nice and smooth. Then just go ahead and put it back in. Make sure everything is looking good. You can pull this and make sure everything is smooth. You can put your bobbin back in and start anew. If you do this, and you're still having problems, it may be for a couple of reasons. One, your bobbin casing, if you notice right now, it's locked in place. It's not falling out. Our notch here is in this groove where it holds it all together. If your bobbin casing isn't all the way in, that could be a problem that you're experiencing. Another problem is you might be threading the bobbin in the casing incorrectly. I always like to just think of everything logically. What makes sense? Our groove and our bobbin case is going to the left, and our thread is coming out to the left, everything is going to the left. So, when we put our bobbin in our case, our thread should also be going to the left. If you put your bobbin in going to the right so that the thread is going the other way, like this, then things are not able to move as easily. That could be something that could be something that's causing your bobbin problems. So, we'll just clip that. After you do these things and you get everything set back up, if you're still having problems, one last thing that you can try is to get out a brush. You should've gotten a little lint brush that came with your sewing machine, or you can buy a little photography brush and just kind of get in the bobbin casing and dust out all the lint. You can even see I have some lint in here. But never use the spray can air because that will just push all the lint further in. Getting that lint out that may be stuck in the back will also help with any of your bobbin problems. So that's just a quick way to shoot your bobbin issues.
Why Does My Top Thread Keep Breaking? | Sewing Machine
02:53

Why Does My Top Thread Keep Breaking? | Sewing Machine

Full PLaylist: https://www.youtube.com/playlist?list=PLLALQuK1NDriabACbDfMMfR6KucpOUFC6 - - Top Rated Products for Every Sewing Project: Singer Beginners Sewing Kit: http://amzn.to/1VwUwIN Gingher Dressmaker's Shears: http://amzn.to/1VwW2L3 One-Yard Wonders: 101 Sewing Projects: http://amzn.to/1Q98Dkz Dritz Deluxe Seam Ripper: http://amzn.to/1N3d2Wd Clover Leather Coin Thimble: http://amzn.to/1Ks5IEV Watch more How to Use a Sewing Machine videos: http://www.howcast.com/videos/512591-Why-Does-My-Top-Thread-Keep-Breaking-Sewing-Machine Hi, I'm Jennifer from Workroom Social and today we are going to talk about why does my top thread keep breaking? I don't know if you've ever experienced this, I know I have. You'll be sewing and all of a sudden your top thread will just break right in the middle of a seam. Super annoying! So I'm going to talk to you today about some ways to troubleshoot those problems. The first thing you should do is just to re-thread your machine. Just take everything out. Go ahead and pull on your thread, make sure everything's moving smoothly up there. You can cut the tail off and just start from scratch. That's going to be the easiest way to troubleshoot this because sometimes things just get a little bit funny. Okay, so I'm re-threaded and now, hopefully, I will be sewing easily without any problems. But if you're still having problems, there are a couple of things to check on. First is your tension. Sometimes if your tension is too high, if this were up, I don't know, maybe I accidentally had it all the way at nine, your thread can get stuck and it can tear. So that's one reason why your thread might be ripping. Other things to look for are obstacles. Is your thread getting caught on something? Perhaps up here maybe my thread accidentally got twisted around here, this tension disk, which is used for winding our bobbins, and so that's putting a lot of stress on the thread and as it's going through the machine, it just rips. So check for any obstacles that might be affecting your stitches. The last thing that you should check is the spool itself. Sometimes on home machines, the spool of thread itself can be too heavy, too big, and it kind of gets stuck spinning around the spindle here, and so that can put a lot of tension on the thread and cause it to rip. If the spool is just a normal spool, it's not a giant spool, you might want to take the spool off and double check this bottom area here and make sure that there's nothing that's holding the spool taut while it's turning. Maybe over time you're getting a lot of adhesive buildup from the bottom of your spools on your sewing machine and that's causing it to not move smoothly. So that's just a couple of things that you can do to troubleshoot, to try and figure out why your top thread keeps breaking.

Time to Bag It Up

bottom of page